↧
The Making of the Birdman Suit
↧
Sensorbat. Turning a toy into a costume. please help!
Hi,
I'm new to the forum. I've been sculpting, designing resin and soft vinyl toys for a few years now, and have been trying to get my head around making a costume of one of my own designs.
Here is the design as a toy in it's 1/6 scale version. Ignore the henshin cyborg in the background, I didn't make those!
![Click image for larger version.
Name: IMG_4524.jpg
Views: 17
Size: 27.4 KB
ID: 442675]()
![Click image for larger version.
Name: IMG_4521.jpg
Views: 10
Size: 39.5 KB
ID: 442674]()
![Click image for larger version.
Name: IMG_4520.jpg
Views: 15
Size: 34.3 KB
ID: 442673]()
![Click image for larger version.
Name: IMG_4519.jpg
Views: 10
Size: 39.1 KB
ID: 442672]()
I had a bash at making the head out of a mix of various materials (foam board, light paperclay, new fando, fibre glass/bondo). However, I just succeeded in making an over bulky mismatched mask that defies further detailing revisions. I've decided to start again, using Monster Clay over a plaster bust, and molding from that. It's my first time with Monster Clay, but I've heard it's probably closest to the way I way I want to sculpt.
![Click image for larger version.
Name: IMG_4517.jpg
Views: 6
Size: 41.6 KB
ID: 442671]()
This time I really need a clearer action plan. The two huge questions that I need to address are:
1) what material should I use to making the final casts?
I gather Silicon, FRP or Latex at probably the only options as I am casting from molds? With the heavy ears and somewhat irregular shape (away from the features of my own face) I'm veering towards FRP. Is this the right choice?
2) How to get the mask of and on from my head. My plan with the first try was that front and back should separate.Would it be best to keep it as a one part helmet, but with a separate attachable neck?
I will try and finish the whole costume if possible, hopefully before mid-May if possible in time for Design Festa in Japan, but for now I'm focusing on the mask.
Any suggestions and advice really would be much appreciated. While I learned a lot screwing up the first attempt, it would be nice to get it right this time!
I'm new to the forum. I've been sculpting, designing resin and soft vinyl toys for a few years now, and have been trying to get my head around making a costume of one of my own designs.
Here is the design as a toy in it's 1/6 scale version. Ignore the henshin cyborg in the background, I didn't make those!
I had a bash at making the head out of a mix of various materials (foam board, light paperclay, new fando, fibre glass/bondo). However, I just succeeded in making an over bulky mismatched mask that defies further detailing revisions. I've decided to start again, using Monster Clay over a plaster bust, and molding from that. It's my first time with Monster Clay, but I've heard it's probably closest to the way I way I want to sculpt.
This time I really need a clearer action plan. The two huge questions that I need to address are:
1) what material should I use to making the final casts?
I gather Silicon, FRP or Latex at probably the only options as I am casting from molds? With the heavy ears and somewhat irregular shape (away from the features of my own face) I'm veering towards FRP. Is this the right choice?
2) How to get the mask of and on from my head. My plan with the first try was that front and back should separate.Would it be best to keep it as a one part helmet, but with a separate attachable neck?
I will try and finish the whole costume if possible, hopefully before mid-May if possible in time for Design Festa in Japan, but for now I'm focusing on the mask.
Any suggestions and advice really would be much appreciated. While I learned a lot screwing up the first attempt, it would be nice to get it right this time!
↧
↧
The Rat Patrol (Hitch's red Kepi) help
Hi all,
I am looking replicate Hitch's Red kepi and need some help with clean screen shots.
Front, side, Top. Anything you guys could help me with would be great.
Thanks again
Steve
I am looking replicate Hitch's Red kepi and need some help with clean screen shots.
Front, side, Top. Anything you guys could help me with would be great.
Thanks again
Steve
↧
Dum Dum Dugan belt
Anybody recognize this belt buckle? It's not a standard web belt clasp. The jacket is a WWII M42 with the sleeves removed, but I can't identify the darned belt.
http://www.highdefdigest.com/blog/wp...carter-105.jpg
http://www.highdefdigest.com/blog/wp...carter-105.jpg
↧
Imperial Heavy Armor (In need of tips)
Hello! I'm making my very first cosplay costume and I'm kinda stuck.
I'm making an Imperial Heavy Armor set, and though I'm female I want to make the chest armor flat like the male version (because chest armor formed after your boobs realistically risks cracking your ribs should you fall on your face so nobody ever had those in real life and for good reasons)
I'm not sure how to make this chest armor piece. I'm thinking of making it out of craft foam, but want to make it so the seams wont show but it will still be easy to put on/take off and will look decent enough. If anyone have any tips, tricks and advice I'd be really happy to hear it! I'm open to using other materials but would like it to not be too complicated as it's my first cosplay and I'm not sure I could pull off something too complicated. Thankful for advice!
↧
↧
In Need of Help With Kyoko Cosplay
I'm a fairly new member and I am just getting started on my first cosplay project so please help me out. I will be cosplaying as Kyoko from Deadman Wonderland.
Kyoko wears a navy blue, lapel collared blazer for part of her guard uniform. I have had no luck finding a blazer that meets that description so I may just have to make it myself.
So my first question is; does anyone have a lapel collared blazer sewing pattern I could have? If you don't, do you know of any blazers that match the description?
Also, is there a way I could make some custom patches? These would be used on the hat and on the shoulder. It doesn't matter if they are iron-on or sew-on.
One more thing, how would I go about making glasses for my cosplay? She wears rather large circular glasses and I don't want to just buy them (I'm trying to make all the pieces of the cosplay myself.)
Here is a picture of Kyoko so you understand what I'm looking for:
![Click image for larger version.
Name: 540728-kyoko_1_large.png
Views: 17
Size: 93.2 KB
ID: 443058]()
Anyways, if you have an answer to one of my questions please tell me. As I said, I am fairly new at making cosplay.
Kyoko wears a navy blue, lapel collared blazer for part of her guard uniform. I have had no luck finding a blazer that meets that description so I may just have to make it myself.
So my first question is; does anyone have a lapel collared blazer sewing pattern I could have? If you don't, do you know of any blazers that match the description?
Also, is there a way I could make some custom patches? These would be used on the hat and on the shoulder. It doesn't matter if they are iron-on or sew-on.
One more thing, how would I go about making glasses for my cosplay? She wears rather large circular glasses and I don't want to just buy them (I'm trying to make all the pieces of the cosplay myself.)
Here is a picture of Kyoko so you understand what I'm looking for:
Anyways, if you have an answer to one of my questions please tell me. As I said, I am fairly new at making cosplay.
↧
Wearable plane cosplay help!
First off, I am new to the site, and really excited to learn as much as possible!! I hope I am posting correctly and what not.
I am planning on making a cosplay from the game DOTA2. The character is called Gyrocopter.
![Click image for larger version.
Name: gyro1.jpg
Views: 53
Size: 58.4 KB
ID: 443074]()
My plan is using EVA foam for the majority of this build. I am not sure if I am over thinking it, but I am unsure if I need a skeleton under the foam to achieve a solid build of the plane around me. I also want to make this separable for easy transport. I have been searching all through google, and maybe I am using the wrong terms, but I can not seem to find a tutorial on anything similar. Any form of help or pointers would be such a life saver! This is my biggest project to date and I am so excited to see what I can make happen! :D
Thanks again for any help!
I am planning on making a cosplay from the game DOTA2. The character is called Gyrocopter.
My plan is using EVA foam for the majority of this build. I am not sure if I am over thinking it, but I am unsure if I need a skeleton under the foam to achieve a solid build of the plane around me. I also want to make this separable for easy transport. I have been searching all through google, and maybe I am using the wrong terms, but I can not seem to find a tutorial on anything similar. Any form of help or pointers would be such a life saver! This is my biggest project to date and I am so excited to see what I can make happen! :D
Thanks again for any help!
↧
Firefly Browncoat Costume (non 76th Overlander) WIP
So last year at Wizard World Nashville I tried my hand at a Browncoat costume and had some fun. This year Captain Reynolds himself will be there so I'm bringing back the Browcoat! But I'm revamping it so it doesn't look thrown together. This will be my area for the WIP.
↧
Fright Night 1985: Peter Vincent Vampire Killer main costume breakdown and prop info
Hey guys. I thought the original Fight Night was fun, witty, scary and absolutely perfect for its time and place in history. Everything clicked. It wan't trying to be anything it wasn't and was everything it could possibly be. One of my big regrets is not going to Horror Cons in college and not getting to meet Roddy McDowall, surely a superb actor and a gentleman to boot.
One of the best costumes in the movie was Peter Vincent's "Horror Host" outfit, taken from one of his old Hammer-type flicks. It was made to look like what it was: a 70's-80's take on an 1830's to 1870's gentleman's every-day wear with some mishmash of styles from several time periods put into one with some interesting elements thrown in. I am doing a breakdown of the "closest I can get" versus the real version in this thread and would love input and/or corrections from fans who have more info to both help me and you guys make a better costume. Will add other posts to this thread as I go/acquire/make more of this all work. I'll start from the top down.
The necklace:
Peter Vincent is wearing a necklace with alternating black and white or black and silver beads ( they look ivory to me, which is what I picked, but I could be wrong) with three charms on them. In the photo on his right, there is a golden Italian horn with cap. I tried "gold fang" with similar but not close enough results. The Italian horn is curved the right way. On Peters left is a golden winged scarab charm which I found a near match for on Etsy. In the center is a gold or brass or bronze hamsa or khamsah which is a five fingered amulet popular the middle east. Peters has a Star of David in the center and is the version with the thumb sticking out to his right instead of the symmetrical version with two "thumbs". Here is the first one I made ( am working on a second with a bigger hamsa) with a black and white close up of the original from a movie still. This charm necklace was presumably to ward off evil while not having any actual crosses on it for Peter to use against Jerry Dandridge. This part of the costume was not seen in Fright Night II.![Click image for larger version.
Name: IMG_3295.jpg
Views: 8
Size: 5.53 MB
ID: 443122]()
![Click image for larger version.
Name: IMG_3298.jpg
Views: 11
Size: 1.46 MB
ID: 443123]()
The jacket:
This is a warm-brown velvet coat with satin edging or piping. The cut is like a riding jacket or sport coat in that it much shorter than a frock coat but still has Victorian or pre-victorian styling. The lapels have three irregular peaks similar to costume jackets worn in Hammer films, and in other gothic tales like "House of Usher" in the 1960's. I'm not sure but that type of tailoring was popular in the 1830's and 40's. Here's a comparison picture of Winthrop's jacket in "Usher" and Vincent Price wearing one with a similar cut from the same movie.![Click image for larger version.
Name: 327968214.jpg
Views: 11
Size: 25.3 KB
ID: 443124]()
![Click image for larger version.
Name: Fright_Night_1985_Roddy_McDowall_with_Cross.jpg
Views: 4
Size: 288.1 KB
ID: 443125]()
![Click image for larger version.
Name: HaBqPdq.jpg
Views: 8
Size: 26.4 KB
ID: 443126]()
![Click image for larger version.
Name: house-of-usher.jpg
Views: 8
Size: 217.1 KB
ID: 443127]()
![Click image for larger version.
Name: vusher.jpg
Views: 5
Size: 115.3 KB
ID: 443128]()
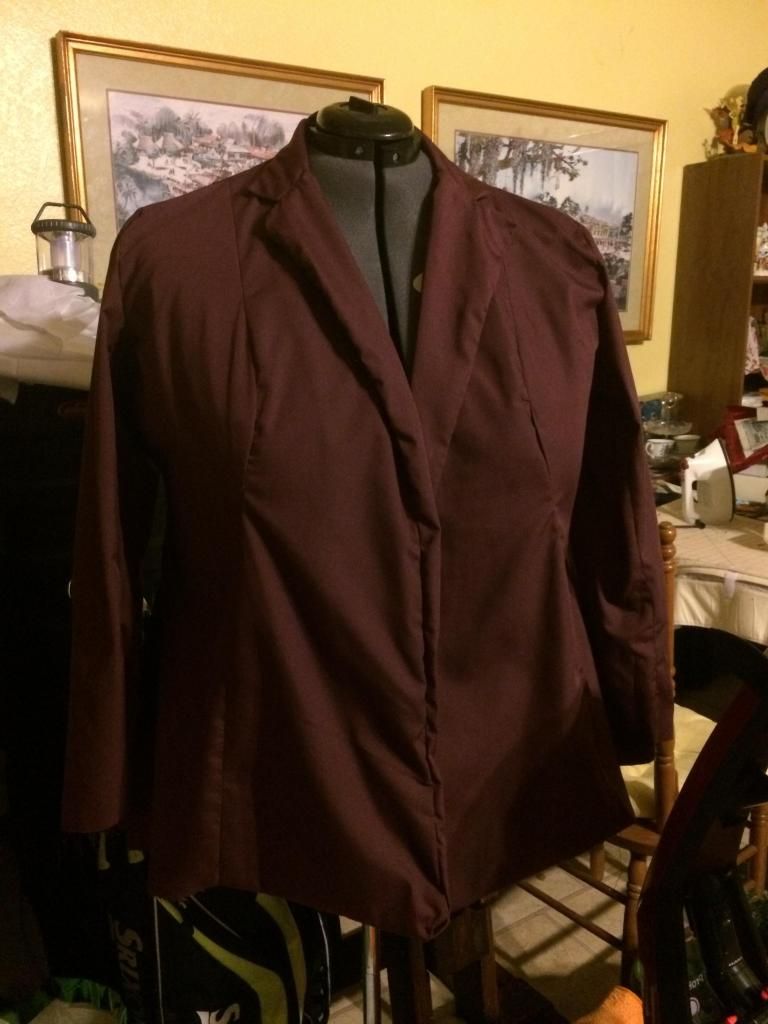
I will eventually custom tailor one for myself, but my stand-in is a Marc Ecko Orisis Velvet blazer with satin piping. I bought more satin to line the pocket edges and make the arms bands to more closely match the movie one ( I used a Bias tape maker and an iron but have not sewn them in yet) and have added two brown buttons on the back left and right. I could alter the lapels on this one but I'll leave it for now.![Click image for larger version.
Name: IMG_3300.jpg
Views: 7
Size: 3.83 MB
ID: 443132]()
![Click image for larger version.
Name: IMG_3303.jpg
Views: 8
Size: 3.79 MB
ID: 443133]()
One of the best costumes in the movie was Peter Vincent's "Horror Host" outfit, taken from one of his old Hammer-type flicks. It was made to look like what it was: a 70's-80's take on an 1830's to 1870's gentleman's every-day wear with some mishmash of styles from several time periods put into one with some interesting elements thrown in. I am doing a breakdown of the "closest I can get" versus the real version in this thread and would love input and/or corrections from fans who have more info to both help me and you guys make a better costume. Will add other posts to this thread as I go/acquire/make more of this all work. I'll start from the top down.
The necklace:
Peter Vincent is wearing a necklace with alternating black and white or black and silver beads ( they look ivory to me, which is what I picked, but I could be wrong) with three charms on them. In the photo on his right, there is a golden Italian horn with cap. I tried "gold fang" with similar but not close enough results. The Italian horn is curved the right way. On Peters left is a golden winged scarab charm which I found a near match for on Etsy. In the center is a gold or brass or bronze hamsa or khamsah which is a five fingered amulet popular the middle east. Peters has a Star of David in the center and is the version with the thumb sticking out to his right instead of the symmetrical version with two "thumbs". Here is the first one I made ( am working on a second with a bigger hamsa) with a black and white close up of the original from a movie still. This charm necklace was presumably to ward off evil while not having any actual crosses on it for Peter to use against Jerry Dandridge. This part of the costume was not seen in Fright Night II.
The jacket:
This is a warm-brown velvet coat with satin edging or piping. The cut is like a riding jacket or sport coat in that it much shorter than a frock coat but still has Victorian or pre-victorian styling. The lapels have three irregular peaks similar to costume jackets worn in Hammer films, and in other gothic tales like "House of Usher" in the 1960's. I'm not sure but that type of tailoring was popular in the 1830's and 40's. Here's a comparison picture of Winthrop's jacket in "Usher" and Vincent Price wearing one with a similar cut from the same movie.
I will eventually custom tailor one for myself, but my stand-in is a Marc Ecko Orisis Velvet blazer with satin piping. I bought more satin to line the pocket edges and make the arms bands to more closely match the movie one ( I used a Bias tape maker and an iron but have not sewn them in yet) and have added two brown buttons on the back left and right. I could alter the lapels on this one but I'll leave it for now.
↧
↧
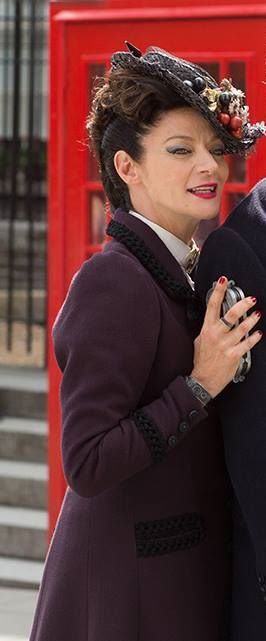
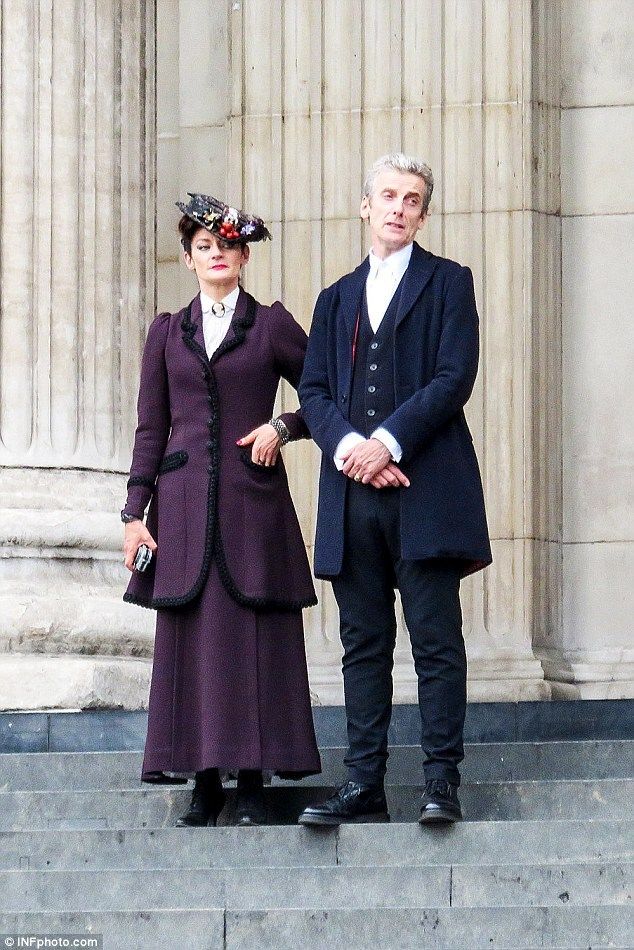
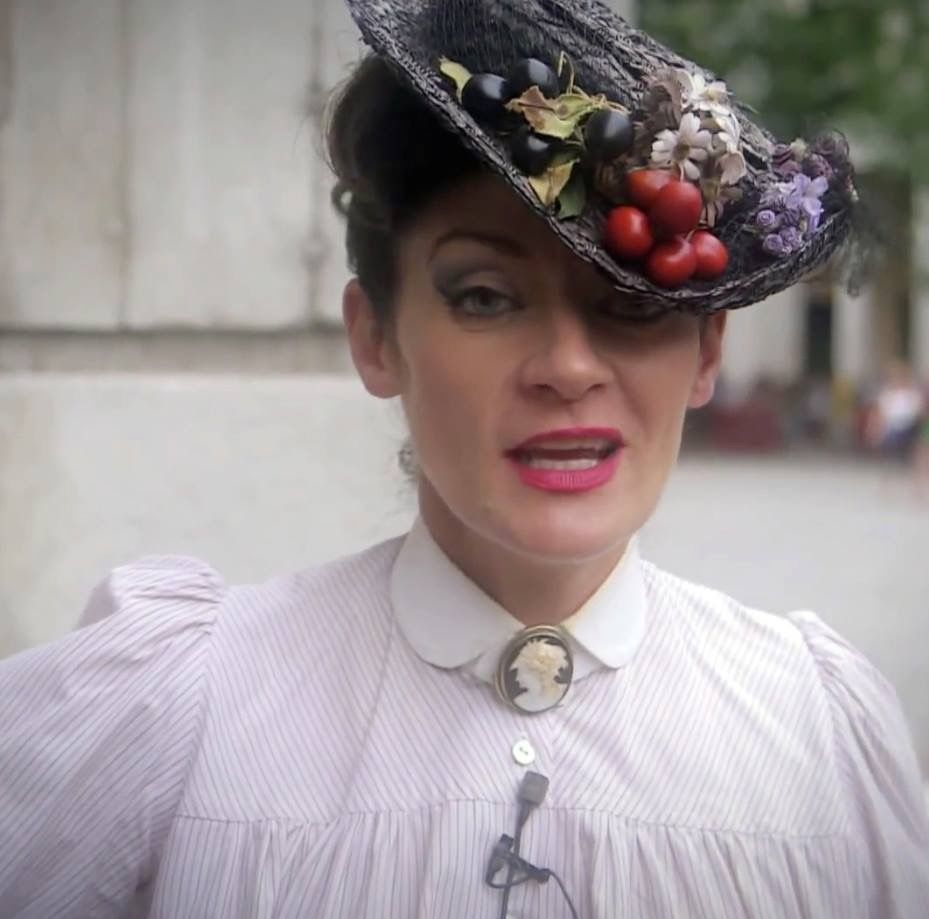
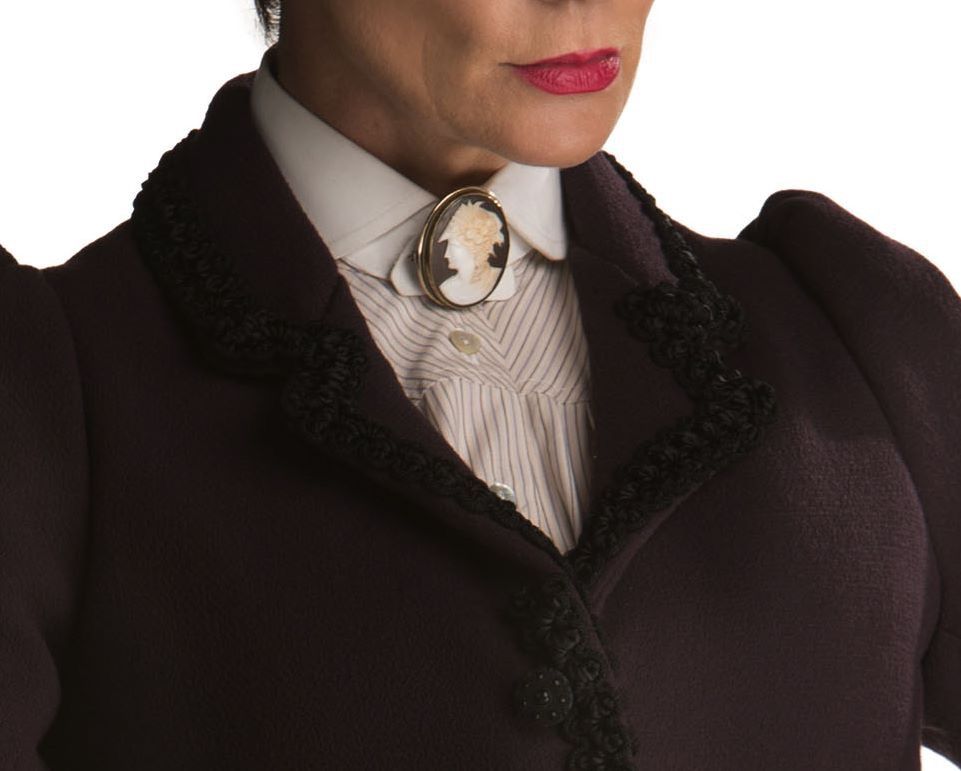
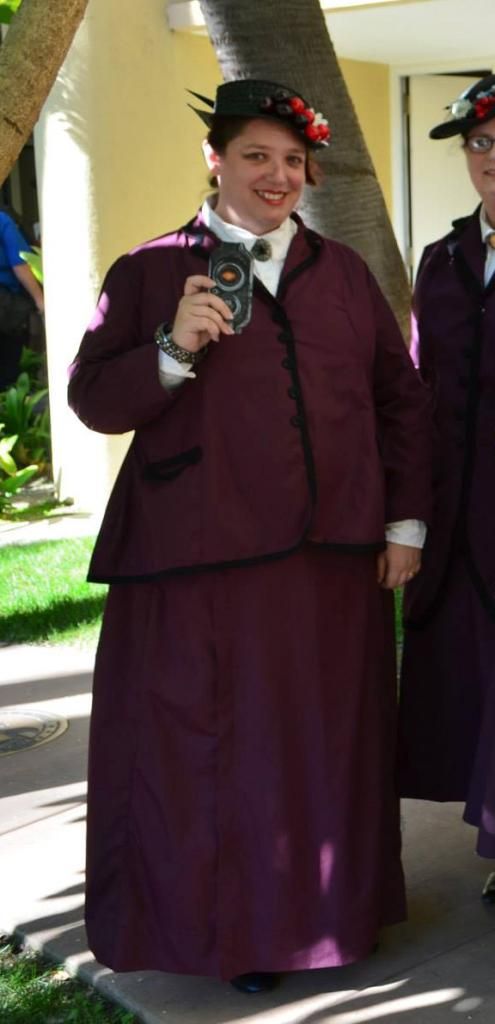
Doctor Who - Missy (Season 8, purple)
I wanted to share with you my Missy purple suit build. For starters, here are some reference photos of the screen version:
![]()
![]()
![]()
![]()
![]()
![]()
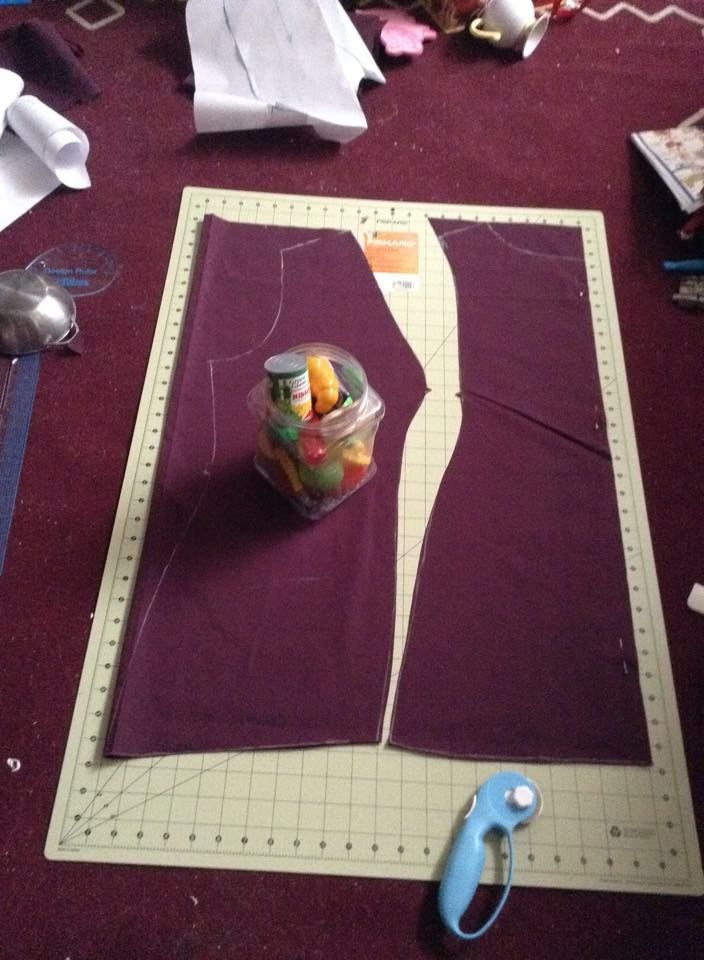
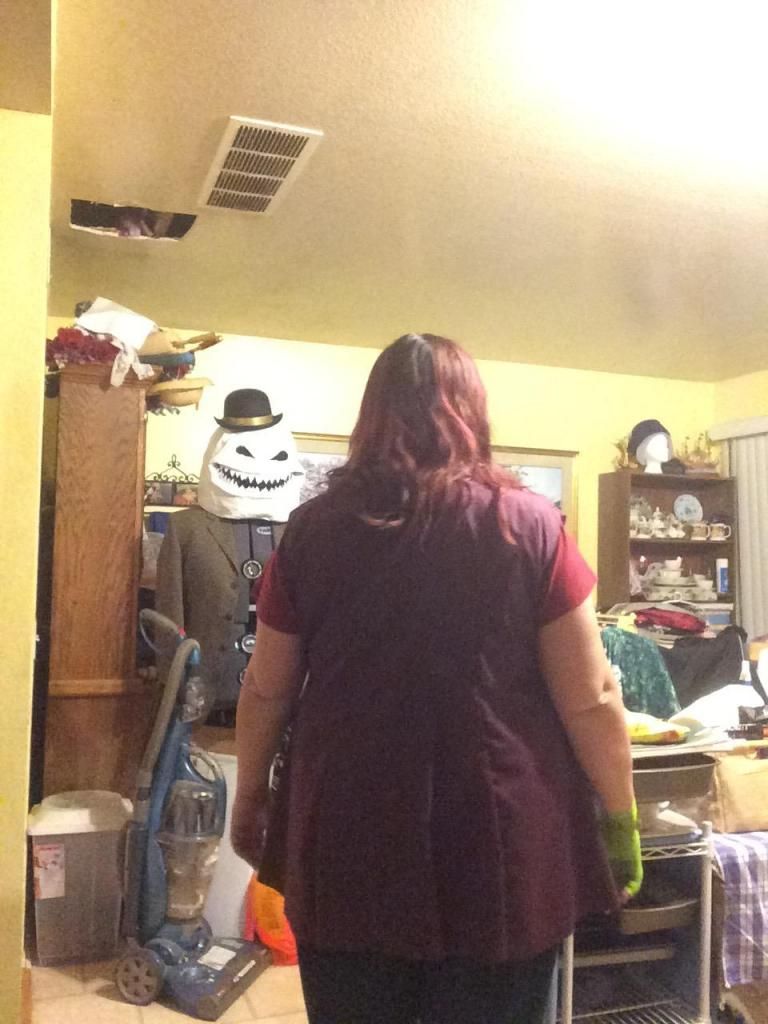
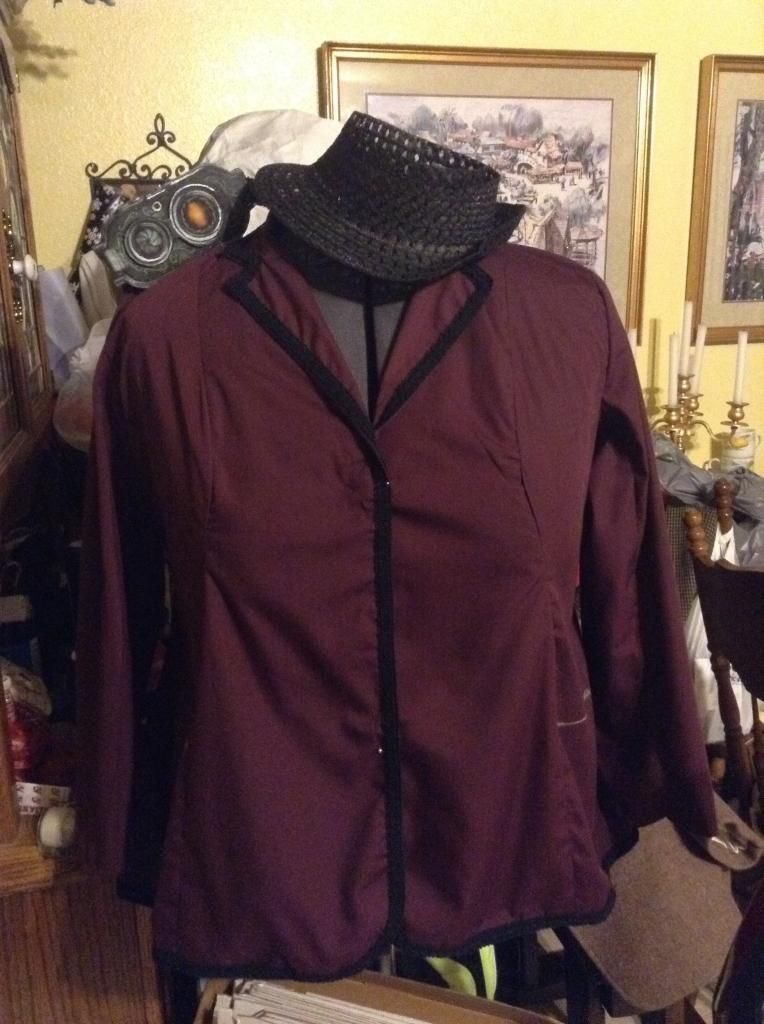
So, onto the build. I started with Sense & Sensibility's 1909 Beatrix Jacket pattern (and later, the skirt pattern). I made significant modifications to the pattern due to sizing issues, but more importantly, I got rid of the two back pleats and replaced them with a single back vent.
![]()
![]()
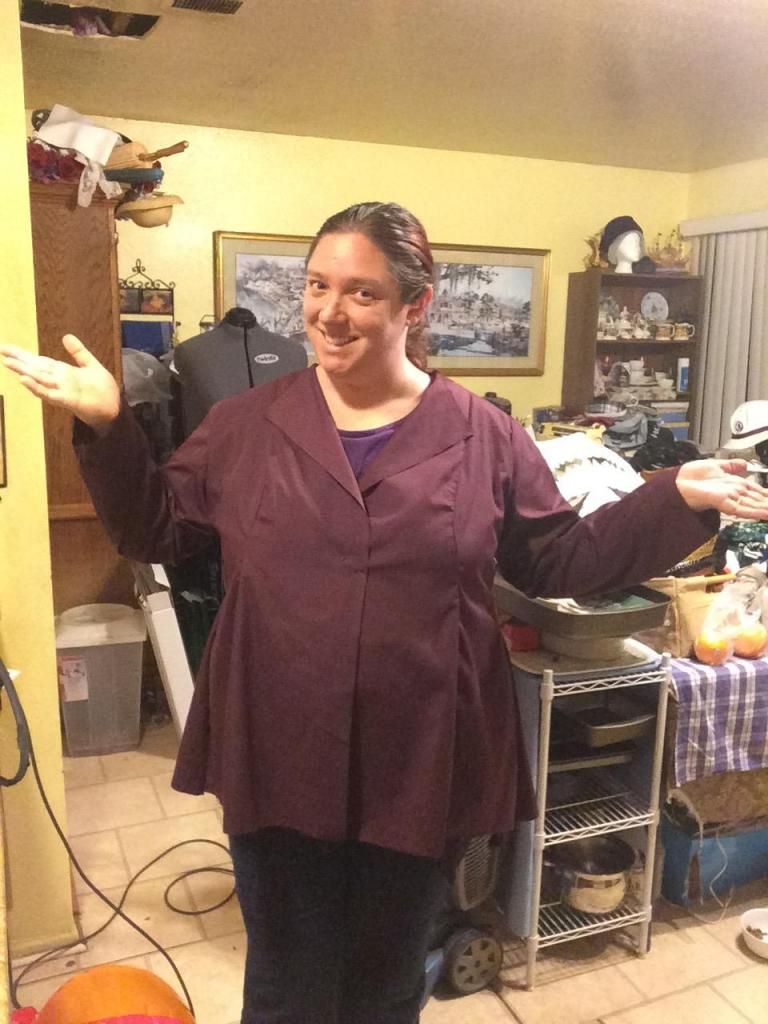
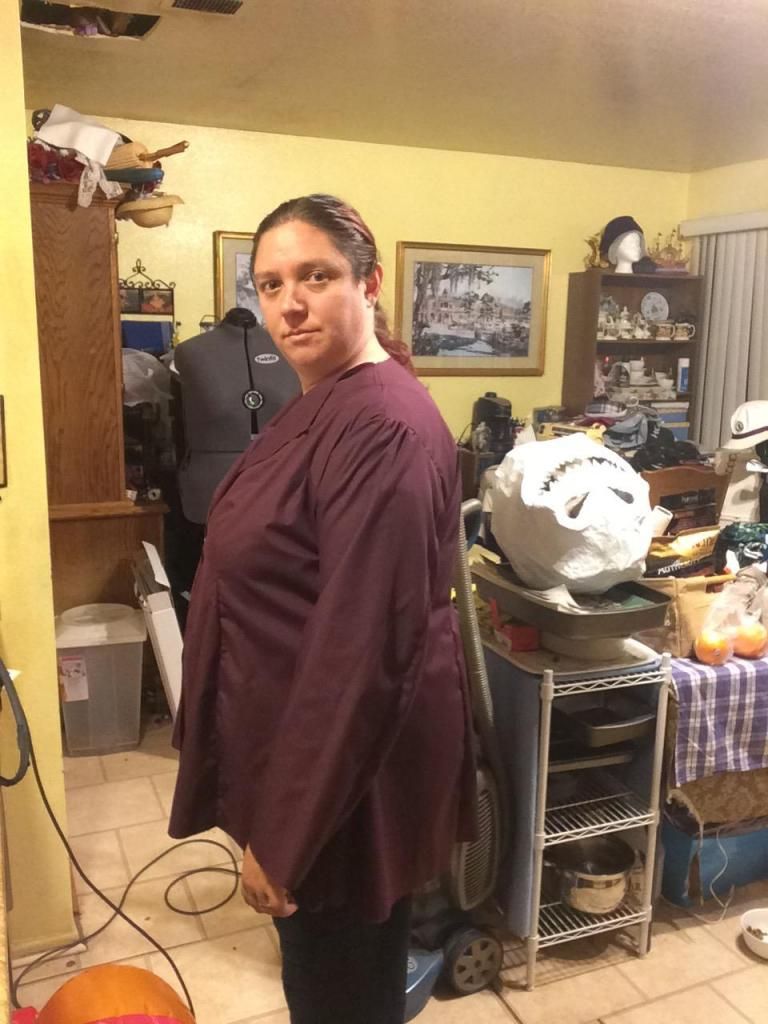
Overall fit was okay. The back was great, but the front will need alterations to the pattern before I make it again (this costume was unlined eggplant colored broadcloth, my eventual plan would be to make this up in crepe - wool is SA but not conducive to the SoCal climate). I need to add about 2" to all front pieces, and some of the bust curve I took out needs to be put back in, reduce flare over the hips, and possibly add an additional 6" to all pieces after that.
![]()
![]()
![]()
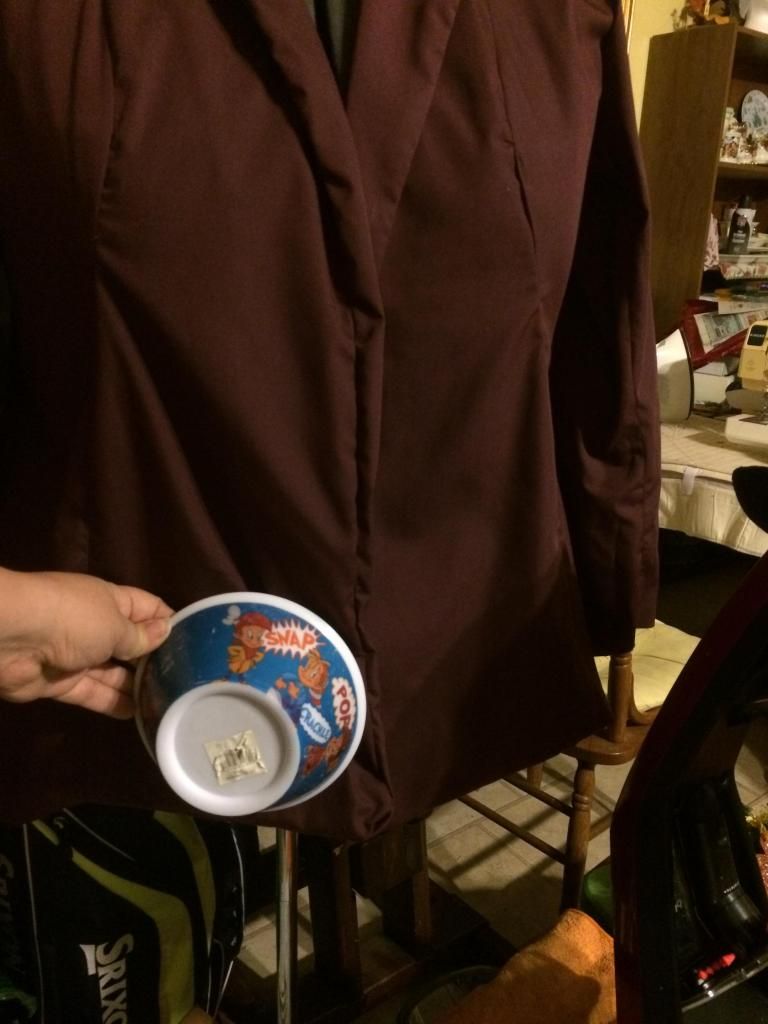
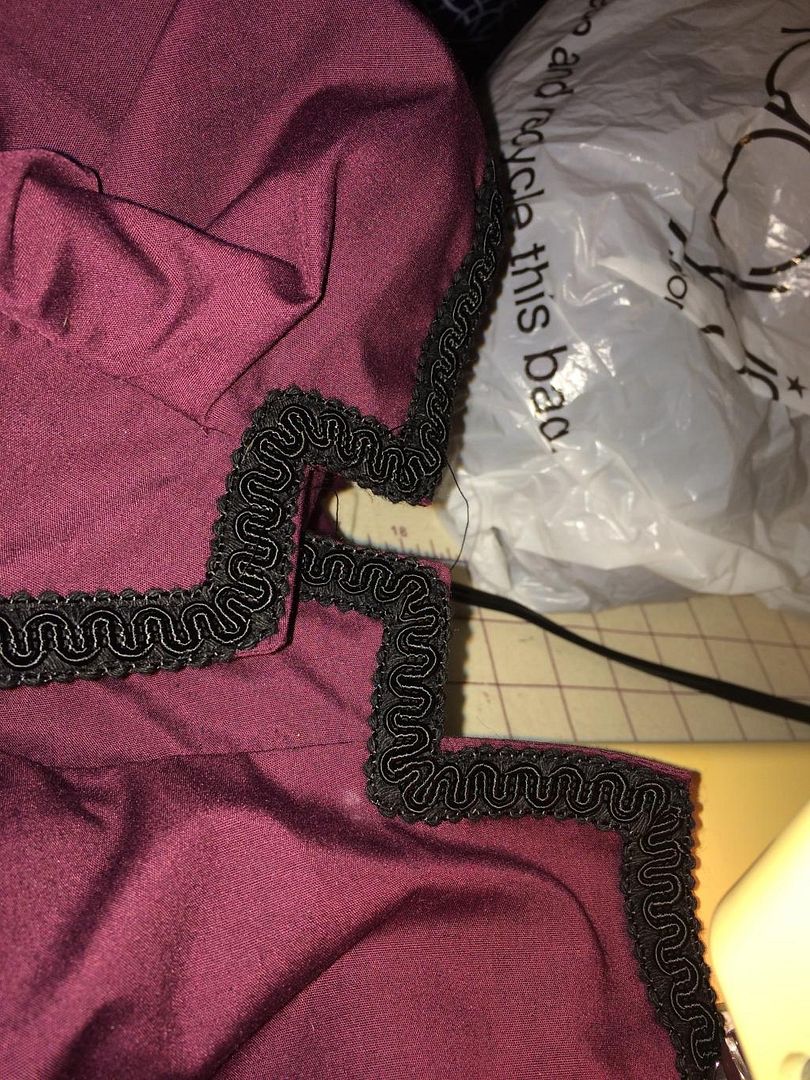
One other adjustment to the pattern, which I did later, was to curve the bottom front corners. Which was accomplished with the help of a trusty bowl.
![]()
![]()
![]()
Marked out buttonholes only to discover the screen version had buttons on top, but snaps underneath. Actually this is a nice feature, and I suggest doing it that way. Before I move onto trim, a couple things about the collar. Collar was a pain, as collars are wont to be. I made a mistake stay stitching the neckline. It wasn't in the directions, I just did it. Now I know why it wasn't in the directions. Also, this pattern is designed to be fully lined. I tried to skip lining and just make facings. Honestly, it would have been easier to cut out a full lining, not to mention the overall improvements to construction and lie that come with lining garments. The pattern gives instructions for period support for the roll collar, which is nice.
![]()
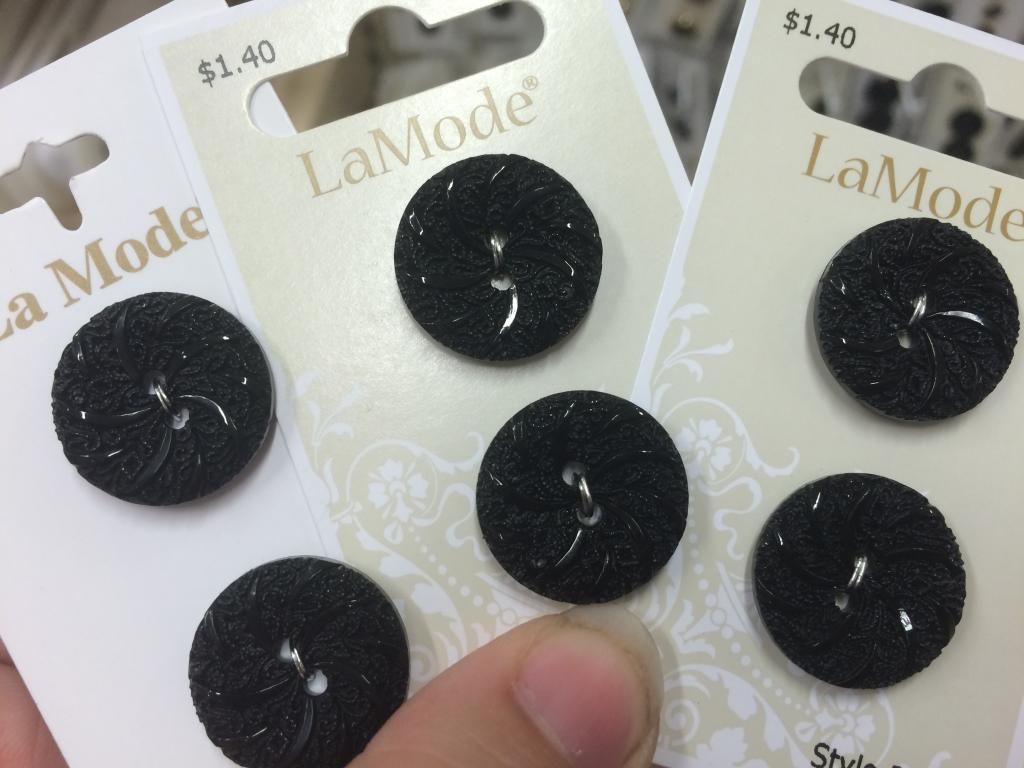
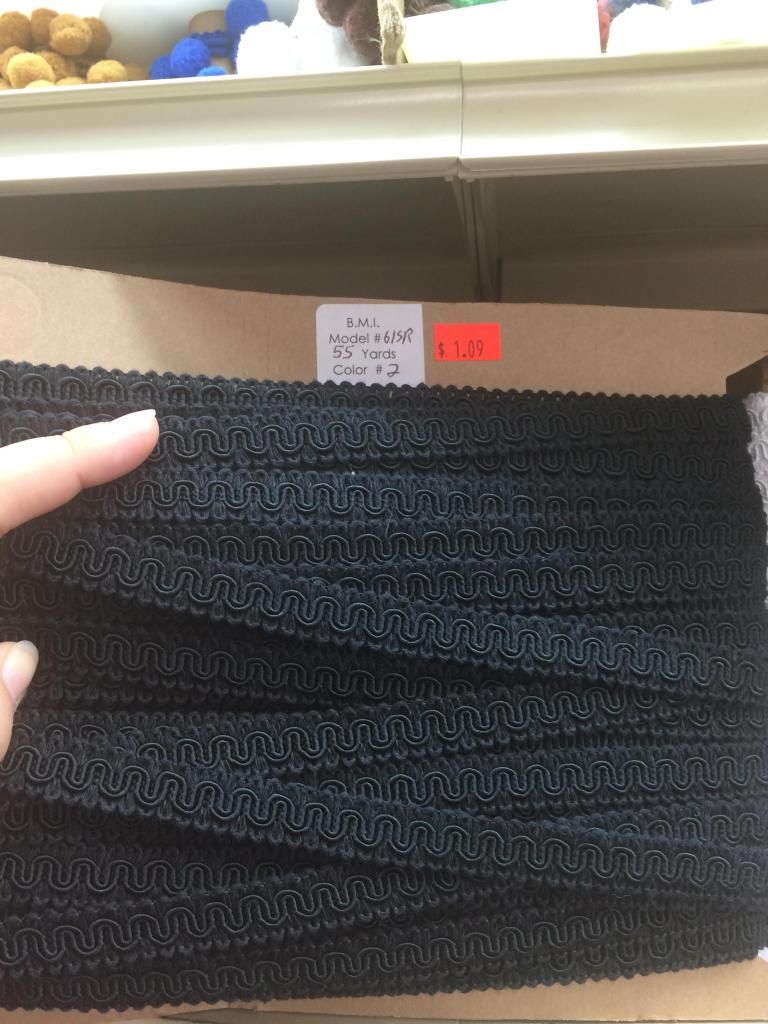
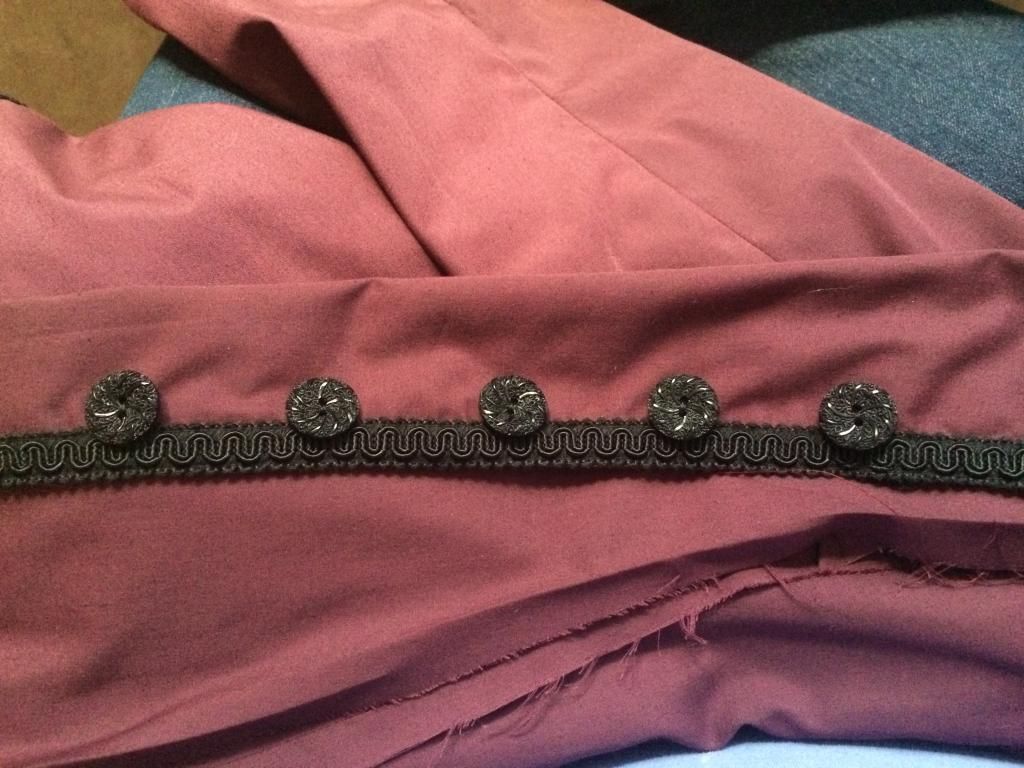
Okay, so buttons. SA buttons were nowhere to be found, but I picked up this pretty good button at a local JoAnn's. And braid at M&L Fabrics. There was a more accurate thick trim available, but knowing this was a "test" version, I went with the budget option. If you have seen the released Missy clip in advance of Season 9, this was not a bad call ;)
![]()
![]()
![]()
![]()
![]()
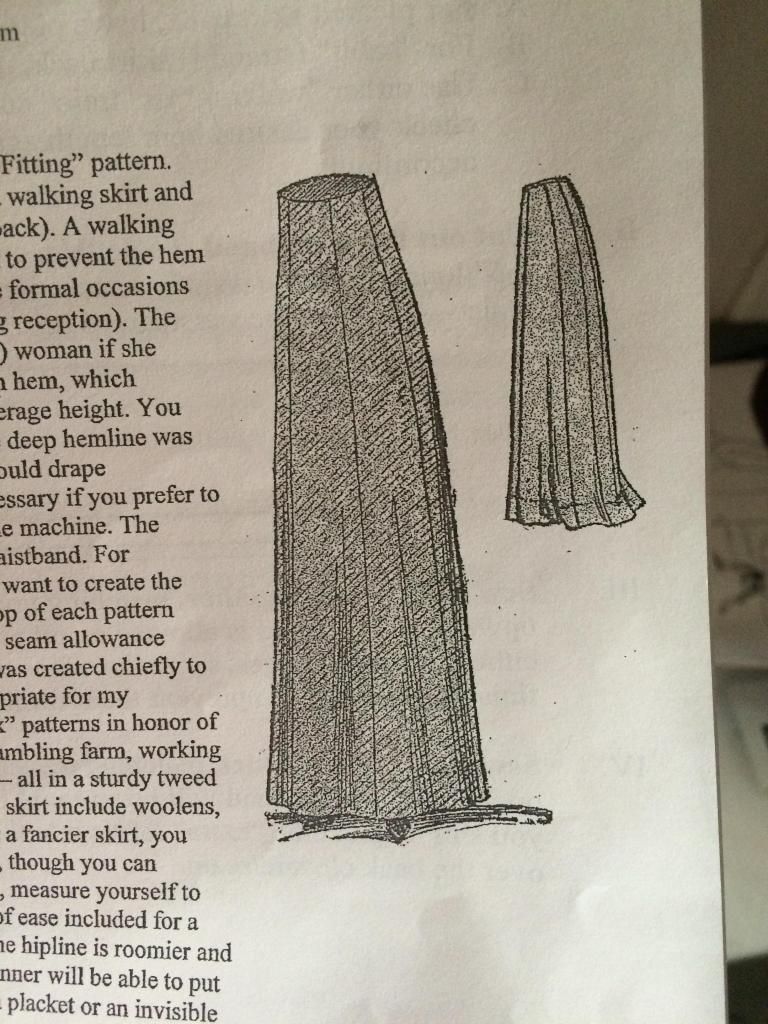
I don't have any in-progress pics of the skirt, but I made the walking skirt variation with the habit back. (Again, using 1909 Beatrix Skirt pattern by Sense & Sensibility) I added 2" to each side of the center front panel, to create 1" deep pleats/tucks on either side, as per the screen version. 4" deep hem, per the pattern. Beautiful fit, material could have cooperated better, especially on those pleats, but I suspect remaking in more substantial fabric will solve that on its own.
![]()
I'll have to share details of the hat in a later post - it was a cheap straw trilby (fedora to most) when it started, underwent significant changes, and I sculpted a hatpin as well.
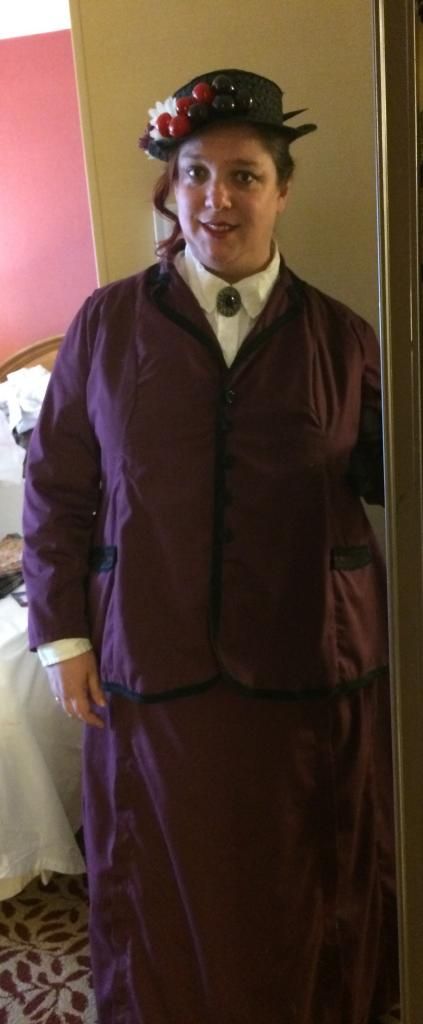
Final result:
![]()
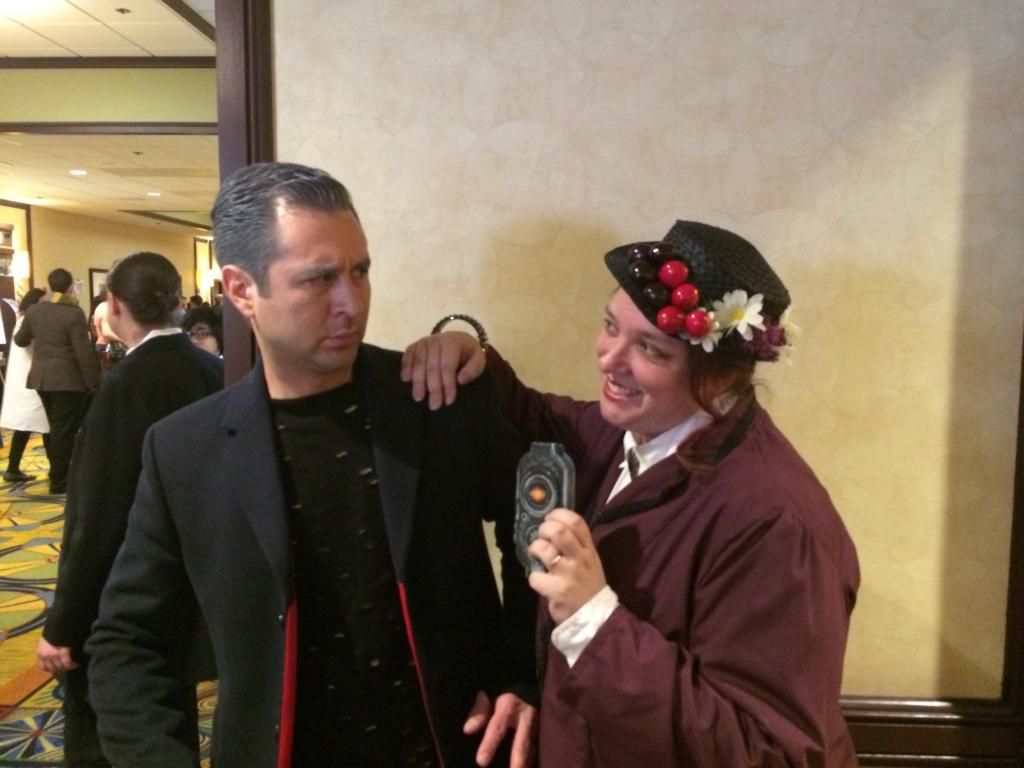
Here with the Missy device which I detailed in a prop thread previously:
![]()
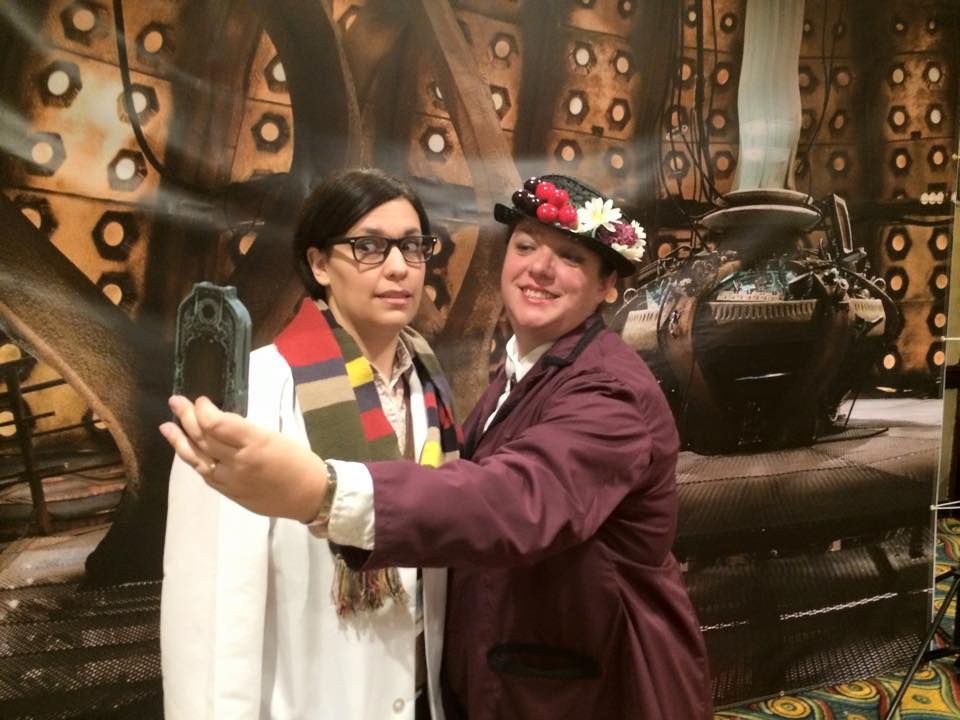
Harassing the 12th Doctor:
![]()
Harassing Osgood:
![]()
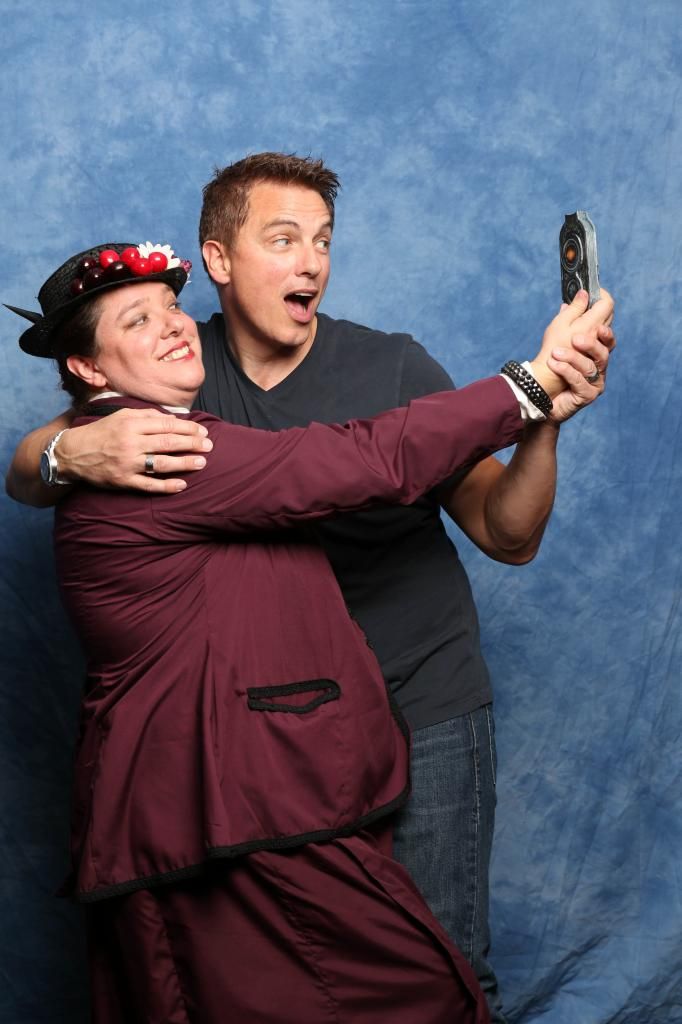
And John Barrowman:
![]()
![]()
Some final notes: Jacket could be about 6" longer all around, front of jacket needs about 2" more to even up with the back, some of that at the top of the shoulder which will help with bust curve issues (I may have the earlier version of the pattern which had omitted the extra space at the top for larger sizes). The skirt is fabulous, but to be a bit more screen accurate, should be cut shorter (refer to photos at top). This version I didn't quite get to the buttons and trim on the sleeves in time for the Con. But all in all, a very fun costume to do.


So, onto the build. I started with Sense & Sensibility's 1909 Beatrix Jacket pattern (and later, the skirt pattern). I made significant modifications to the pattern due to sizing issues, but more importantly, I got rid of the two back pleats and replaced them with a single back vent.

Overall fit was okay. The back was great, but the front will need alterations to the pattern before I make it again (this costume was unlined eggplant colored broadcloth, my eventual plan would be to make this up in crepe - wool is SA but not conducive to the SoCal climate). I need to add about 2" to all front pieces, and some of the bust curve I took out needs to be put back in, reduce flare over the hips, and possibly add an additional 6" to all pieces after that.
One other adjustment to the pattern, which I did later, was to curve the bottom front corners. Which was accomplished with the help of a trusty bowl.

Marked out buttonholes only to discover the screen version had buttons on top, but snaps underneath. Actually this is a nice feature, and I suggest doing it that way. Before I move onto trim, a couple things about the collar. Collar was a pain, as collars are wont to be. I made a mistake stay stitching the neckline. It wasn't in the directions, I just did it. Now I know why it wasn't in the directions. Also, this pattern is designed to be fully lined. I tried to skip lining and just make facings. Honestly, it would have been easier to cut out a full lining, not to mention the overall improvements to construction and lie that come with lining garments. The pattern gives instructions for period support for the roll collar, which is nice.
Okay, so buttons. SA buttons were nowhere to be found, but I picked up this pretty good button at a local JoAnn's. And braid at M&L Fabrics. There was a more accurate thick trim available, but knowing this was a "test" version, I went with the budget option. If you have seen the released Missy clip in advance of Season 9, this was not a bad call ;)
I don't have any in-progress pics of the skirt, but I made the walking skirt variation with the habit back. (Again, using 1909 Beatrix Skirt pattern by Sense & Sensibility) I added 2" to each side of the center front panel, to create 1" deep pleats/tucks on either side, as per the screen version. 4" deep hem, per the pattern. Beautiful fit, material could have cooperated better, especially on those pleats, but I suspect remaking in more substantial fabric will solve that on its own.
I'll have to share details of the hat in a later post - it was a cheap straw trilby (fedora to most) when it started, underwent significant changes, and I sculpted a hatpin as well.
Final result:
Here with the Missy device which I detailed in a prop thread previously:

Harassing the 12th Doctor:
Harassing Osgood:
And John Barrowman:
Some final notes: Jacket could be about 6" longer all around, front of jacket needs about 2" more to even up with the back, some of that at the top of the shoulder which will help with bust curve issues (I may have the earlier version of the pattern which had omitted the extra space at the top for larger sizes). The skirt is fabulous, but to be a bit more screen accurate, should be cut shorter (refer to photos at top). This version I didn't quite get to the buttons and trim on the sleeves in time for the Con. But all in all, a very fun costume to do.
↧
Severus Snape wig
Hi, does anyone know where in the UK I could buy a Severus Snape wig that is pretty much identical to his hair in the movies?
I have a party to go to and this is the final piece I am missing.
Thanks a lot.
I have a party to go to and this is the final piece I am missing.
Thanks a lot.
↧
My Deadmau5 head - Three versions so far
Hi Guys,
I thought i would post up my Deadmau5 head up here for everyone's comments, I made the base of the head out of paper mache with a fibre glass shell which was modeled off a space hopper! The base was made about 4 years ago so its showing its age now and currently making another one with the possibility of buying an acrylic globe to save time and increase the quality. When ive had other events I have just made new ears to change the look of the head. If anyone has any questions please ask away :)
![Click image for larger version.
Name: 2013-11-03 02.44.07.jpg
Views: 18
Size: 2.14 MB
ID: 444022]()
![Click image for larger version.
Name: DSC03374.JPG
Views: 14
Size: 5.91 MB
ID: 444013]()
![Click image for larger version.
Name: DSC03715.JPG
Views: 16
Size: 6.69 MB
ID: 444030]()
![Click image for larger version.
Name: DSC03716.JPG
Views: 15
Size: 6.63 MB
ID: 444046]()
I thought i would post up my Deadmau5 head up here for everyone's comments, I made the base of the head out of paper mache with a fibre glass shell which was modeled off a space hopper! The base was made about 4 years ago so its showing its age now and currently making another one with the possibility of buying an acrylic globe to save time and increase the quality. When ive had other events I have just made new ears to change the look of the head. If anyone has any questions please ask away :)
↧
Another Tom Baker costume
I grew up watching Troughton and Pertwee, but loved Bakers incarnation
I always wanted the scarf and finally talked my wife into knitting it for me, it wouldnt be accurate to call it a labour of love, she hated every minute of it lol
The colours..... did some research and it seems when the original footage got transfered tfrom Pal to NTSC some of the colour got washed out in the process.
Color Shifting
First one must understand that Dr Who was a British TV show that was filmed
in the PAL color tv format. When it was sold in the US it was converted to NTSC.
This conversion is not always good on the color and results in color shifts and
washed out colors. One can see this by compairing snapshots with screenshots
http://mytardis.tripod.com/scarf.html
So i could have an as seen in the episodes scarf, or the brighter publicity shots version. I actually like the muted colours but went for the brighter one. Like the ones below
http://4.bp.blogspot.com/-m5gBdykC-e...4th+doctor.jpg
http://s595.photobucket.com/user/doc...event.jpg.html
I used the season 12 pattern
![Click image for larger version.
Name: WhoCos 003.JPG
Views: 22
Size: 1.90 MB
ID: 444167]()
I went for the frock coat seen in seeds of doom, horror of fang rock etc. Its not quite screen accurate but its recognisable to most people.
![Click image for larger version.
Name: WhoCos 001.JPG
Views: 3
Size: 1.76 MB
ID: 444190]()
The boots are modified pirate boots and again not perfect, but they work with the rest of the costume.
Ive added a few shirts and other pants as well as brown brogue shoes for days when the boots are a bit OTT.
I have some white poets shirts that are almost right, but the lady who makes them for me is doing me a pair of much more accurate ones with cloth ties in the neck and cuffs as per the deadly assassin costume
![Click image for larger version.
Name: 001.JPG
Views: 7
Size: 4.01 MB
ID: 444188]()
Ive also made an accurate belt since this was taken
![Click image for larger version.
Name: 007.JPG
Views: 5
Size: 3.71 MB
ID: 444187]()
For a proper DW costuming event i shave the beard off, and tuck my hair up under the hat, have taken 1st prize in two events to date.
But if anyone knows of a good wig, Pls PM me. Just cant seem to find one, and i have a larger head (needed the XL indiana jones hat)
Im the same height as Tom, and have as he describes his own "teeth like tombstones" all i need is the hair lol
![Click image for larger version.
Name: 001.JPG
Views: 5
Size: 2.85 MB
ID: 444195]()
I always wanted the scarf and finally talked my wife into knitting it for me, it wouldnt be accurate to call it a labour of love, she hated every minute of it lol
The colours..... did some research and it seems when the original footage got transfered tfrom Pal to NTSC some of the colour got washed out in the process.
Quote:
Color Shifting
First one must understand that Dr Who was a British TV show that was filmed
in the PAL color tv format. When it was sold in the US it was converted to NTSC.
This conversion is not always good on the color and results in color shifts and
washed out colors. One can see this by compairing snapshots with screenshots
So i could have an as seen in the episodes scarf, or the brighter publicity shots version. I actually like the muted colours but went for the brighter one. Like the ones below
http://4.bp.blogspot.com/-m5gBdykC-e...4th+doctor.jpg
http://s595.photobucket.com/user/doc...event.jpg.html
I used the season 12 pattern
I went for the frock coat seen in seeds of doom, horror of fang rock etc. Its not quite screen accurate but its recognisable to most people.
The boots are modified pirate boots and again not perfect, but they work with the rest of the costume.
Ive added a few shirts and other pants as well as brown brogue shoes for days when the boots are a bit OTT.
I have some white poets shirts that are almost right, but the lady who makes them for me is doing me a pair of much more accurate ones with cloth ties in the neck and cuffs as per the deadly assassin costume
Ive also made an accurate belt since this was taken
For a proper DW costuming event i shave the beard off, and tuck my hair up under the hat, have taken 1st prize in two events to date.
But if anyone knows of a good wig, Pls PM me. Just cant seem to find one, and i have a larger head (needed the XL indiana jones hat)
Im the same height as Tom, and have as he describes his own "teeth like tombstones" all i need is the hair lol
↧
↧
The Ultimate Marty McFly Jean Jacket Lining Thread
Okay, so maybe the title is a tad dramatic, but no one has ever truly nailed this fabric, and I think on this momentous year in the BTTF universe, it's about time we did something about that.
So first things first, some of you are probably saying "But I thought Marty's jacket had a paisley pattern...aren't we done?" NOPE. The paisley pattern only extended the length of the sleeves. Inside the body of the jacket, we have THIS masterpiece: (Straightened and the exposure corrected so the details are visible in the shadows)
![Click image for larger version.
Name: Screen Shot 2015-02-26 at 2.03.38 AM.png
Views: 4
Size: 1.76 MB
ID: 444309]()
Some call this the "Hollywood Lining" others say it's all images from Casablanca...well, I say we settle this once and for all and work on identifying EACH of the scenes definitively, down to the frame or movie poster they appear in. So here's a rough color coding of the distinct scenes and images you can see on the jacket lining:
![Click image for larger version.
Name: Screen Shot 2015-02-26 at 1.59.24 AM.png
Views: 3
Size: 2.06 MB
ID: 444303]()
Now let's dive a little deeper into each of these...
1. Red - Woman's face and perhaps chest. ("The Red Woman")
![Click image for larger version.
Name: Screen Shot 2015-02-26 at 2.00.27 AM.png
Views: 3
Size: 830.8 KB
ID: 444304]()
This image is usually hidden in the shadows, but once properly corrected for exposure, it appears to be a woman with a cleft chin possibly in a low-cut top/dress, though it's hard to tell if the bottom half of the image belongs to the same scene. I initially thought it may be Marilyn Monroe, but the artist definitely intended there to be a cleft-chin, which she lacks, so I don't know what other starlets this could be...especially since I don't remember anyone in Casablanca with that much cleavage. (Then again, that's why I think the bottom half may not belong with the face)
2. Yellow - Man's Face ("The Yellow Fellow")
![Click image for larger version.
Name: Screen Shot 2015-02-26 at 2.01.06 AM.png
Views: 2
Size: 835.5 KB
ID: 444305]()
Just a guy's face. The hairline looks like Humphrey Bogart's in Casablanca, but the nose, lips, jaw, and eyes don't seem to be the right shape to be him. Has a certain "Ricky Riccardo" feel to me, but from the lack of an additional scene, it's hard to tell much more.
3. Green - Screaming/Crying Girl ("The Green Scream Queen")
![Click image for larger version.
Name: Screen Shot 2015-02-26 at 2.01.55 AM.png
Views: 2
Size: 1.13 MB
ID: 444306]()
Here's the image rotated to be what I believe to be rightside-up. It appears to be a girl or young woman with a center part in her hair possibly running or kneeling on the ground screaming or crying. My first instinct is that it's Dorothy from Wizard of Oz holding Toto (The shaded part in front of her) but my eyes could just be playing tricks on me.
4. Orange - Back of a Woman's Head ("The Orange Bun")
![Click image for larger version.
Name: Screen Shot 2015-02-26 at 2.02.50 AM.png
Views: 2
Size: 609.7 KB
ID: 444307]()
Yep, that's it...however, this is one that I think I've identified. I think this one could definitely be from Casablanca. Specifically replicating this shot: (Reversed to match the lining's image orientation)
![Click image for larger version.
Name: Screen Shot 2015-02-26 at 2.18.33 AM.png
Views: 2
Size: 850.1 KB
ID: 444311]()
Without more detail in that area, it's a little hard to tell if it might be anything else. However, that hairstyle was popular in early Hollywood, so I will take any other suggestions if you know of a film where a female character has her hair like that.
5. Blue - Man and Woman ("The Blue Two")
![Click image for larger version.
Name: Screen Shot 2015-02-26 at 2.03.20 AM.png
Views: 2
Size: 1.36 MB
ID: 444308]()
This is the one that definitely set people looking for Casablanca-related images as it definitely appears to be based on a different frame from this scene: (Or another where her hair is like this)
![Click image for larger version.
Name: Screen Shot 2015-02-26 at 2.22.16 AM.png
Views: 2
Size: 439.1 KB
ID: 444312]()
Again, I'm open to other ideas, as there are a lot of options here, but THIS is the only drawing that's definitively from Casablanca in my mind.
Now, let's all pool our knowledge and resources to try to finally identify these scenes so we can FINALLY replicate this fabric. So share your thoughts, theories, and speculation (Like on why there's a seam running horizontally through the print, but the design seems uninterrupted, like it was designed to have a seam there) so that together we can all get a little closer to perfection.
So...what do you think, RPF?
-Nick
PS: If anyone has any other shots of the lining, please let me know. If you have a source to protect, we can work something out, I don't want to get anyone in trouble, but I DO want to nail what I consider to be the most un-replicated BTTF costume piece.
PPS: We can also work on pinning down the paisley print too, but the Hollywood Lining seems like a much bigger mountain to climb, so I chose to start there.
So first things first, some of you are probably saying "But I thought Marty's jacket had a paisley pattern...aren't we done?" NOPE. The paisley pattern only extended the length of the sleeves. Inside the body of the jacket, we have THIS masterpiece: (Straightened and the exposure corrected so the details are visible in the shadows)
Some call this the "Hollywood Lining" others say it's all images from Casablanca...well, I say we settle this once and for all and work on identifying EACH of the scenes definitively, down to the frame or movie poster they appear in. So here's a rough color coding of the distinct scenes and images you can see on the jacket lining:
Now let's dive a little deeper into each of these...
1. Red - Woman's face and perhaps chest. ("The Red Woman")
This image is usually hidden in the shadows, but once properly corrected for exposure, it appears to be a woman with a cleft chin possibly in a low-cut top/dress, though it's hard to tell if the bottom half of the image belongs to the same scene. I initially thought it may be Marilyn Monroe, but the artist definitely intended there to be a cleft-chin, which she lacks, so I don't know what other starlets this could be...especially since I don't remember anyone in Casablanca with that much cleavage. (Then again, that's why I think the bottom half may not belong with the face)
2. Yellow - Man's Face ("The Yellow Fellow")
Just a guy's face. The hairline looks like Humphrey Bogart's in Casablanca, but the nose, lips, jaw, and eyes don't seem to be the right shape to be him. Has a certain "Ricky Riccardo" feel to me, but from the lack of an additional scene, it's hard to tell much more.
3. Green - Screaming/Crying Girl ("The Green Scream Queen")
Here's the image rotated to be what I believe to be rightside-up. It appears to be a girl or young woman with a center part in her hair possibly running or kneeling on the ground screaming or crying. My first instinct is that it's Dorothy from Wizard of Oz holding Toto (The shaded part in front of her) but my eyes could just be playing tricks on me.
4. Orange - Back of a Woman's Head ("The Orange Bun")
Yep, that's it...however, this is one that I think I've identified. I think this one could definitely be from Casablanca. Specifically replicating this shot: (Reversed to match the lining's image orientation)
Without more detail in that area, it's a little hard to tell if it might be anything else. However, that hairstyle was popular in early Hollywood, so I will take any other suggestions if you know of a film where a female character has her hair like that.
5. Blue - Man and Woman ("The Blue Two")
This is the one that definitely set people looking for Casablanca-related images as it definitely appears to be based on a different frame from this scene: (Or another where her hair is like this)
Again, I'm open to other ideas, as there are a lot of options here, but THIS is the only drawing that's definitively from Casablanca in my mind.
Now, let's all pool our knowledge and resources to try to finally identify these scenes so we can FINALLY replicate this fabric. So share your thoughts, theories, and speculation (Like on why there's a seam running horizontally through the print, but the design seems uninterrupted, like it was designed to have a seam there) so that together we can all get a little closer to perfection.
So...what do you think, RPF?
-Nick
PS: If anyone has any other shots of the lining, please let me know. If you have a source to protect, we can work something out, I don't want to get anyone in trouble, but I DO want to nail what I consider to be the most un-replicated BTTF costume piece.
PPS: We can also work on pinning down the paisley print too, but the Hollywood Lining seems like a much bigger mountain to climb, so I chose to start there.
↧
Destiny Warlock Cosplay - New to all this!
Hi folks,
I am Rick and I am based in Aberdeen in Scotland.
I am all very new to cosplay but have always wanted to make a replica costume, mainly of a stormtrooper or imperial guard, but I was always hesitant to dive in.
However after reading a LOT of blogs, the 405th.com stickies and watching a LOT of videos on YT, I feel confident to give it a go.
So to date I have started my Pepakura template base for the helmet (once too big, once too warped (don't like hot glue now!) and now may not fit over head without an escape hatch at the back :).
Plan is to make something like this clothes wise:
![]()
![]()
Helmet colours:
![]()
Weapon\Nerf upgrade:
![]()
Current status of last pepakura before I crumpled it in a sigh.....
![]()
Plan is to make an RTV silicone glove mould and fibreglass mother mould, and use EVA foam for armour and bits to make boots and forearms bulkier, with either a sort of sleevless one sided tunic (as sewing arms may be tricky) or a two piece cloak and lower kilt affair.
Lots to do, got everything ready just need to get the pepakura build scaled and finished.
Off work next week so apart from playing destiny (my warlock is level 9.....:( ) I will be cracking on with progress pics :)
Hope to do you all justice.
I am Rick and I am based in Aberdeen in Scotland.
I am all very new to cosplay but have always wanted to make a replica costume, mainly of a stormtrooper or imperial guard, but I was always hesitant to dive in.
However after reading a LOT of blogs, the 405th.com stickies and watching a LOT of videos on YT, I feel confident to give it a go.
So to date I have started my Pepakura template base for the helmet (once too big, once too warped (don't like hot glue now!) and now may not fit over head without an escape hatch at the back :).
Plan is to make something like this clothes wise:


Helmet colours:

Weapon\Nerf upgrade:

Current status of last pepakura before I crumpled it in a sigh.....

Plan is to make an RTV silicone glove mould and fibreglass mother mould, and use EVA foam for armour and bits to make boots and forearms bulkier, with either a sort of sleevless one sided tunic (as sewing arms may be tricky) or a two piece cloak and lower kilt affair.
Lots to do, got everything ready just need to get the pepakura build scaled and finished.
Off work next week so apart from playing destiny (my warlock is level 9.....:( ) I will be cracking on with progress pics :)
Hope to do you all justice.
↧
Destiny Warlock Build: Skull of Dire Ahamkara
Hi I'm Dan, new member, and I just thought I'd share my first build, starting with the helmet I am working on; the Destiny Warlock helmet the Skull of Dire Ahamkara which is my absolute favourite design from Destiny. I was scouring the rpf and the 405th for Pep files and found some great ones by Crimmson over on the 405th, which were already modelled and unfolded, all credit to him there. So I thought I would give it a go. (pic heavy post)
My inspiration is my own character from Destiny.
![Click image for larger version.
Name: 20150225_143200.jpg
Views: 15
Size: 2.41 MB
ID: 444385]()
![Click image for larger version.
Name: 20150225_143203.jpg
Views: 11
Size: 2.42 MB
ID: 444386]()
I modified the Pep file in Pepakura Designer for A4 size paper and checked the scale with the neck opening, which seemed fine for my large-ish head (about 61cms around)
![Click image for larger version.
Name: Pep File.jpg
Views: 9
Size: 418.7 KB
ID: 444373]()
![Click image for larger version.
Name: 20150212_123029.jpg
Views: 6
Size: 2.67 MB
ID: 444374]()
I printed onto 250gsm/ 100lb cardstock which I got from 2 Daler Rowney Bristol Board pads
Building
I started with superglue but quickly moved onto a hot glue gun as this sped up the process considerably
![Click image for larger version.
Name: 20150201_162235.jpg
Views: 14
Size: 2.20 MB
ID: 444365]()
![Click image for larger version.
Name: 20150201_162244.jpg
Views: 8
Size: 1.90 MB
ID: 444366]()
![Click image for larger version.
Name: 20150202_162725.jpg
Views: 10
Size: 2.04 MB
ID: 444367]()
![Click image for larger version.
Name: 20150203_160836.jpg
Views: 10
Size: 2.15 MB
ID: 444368]()
My first go at Pepakura. I know Pep takes a long time but this seemed to take forever, as parts overlay and fold back on each other.
![Click image for larger version.
Name: 20150212_121212.jpg
Views: 12
Size: 2.05 MB
ID: 444369]()
![Click image for larger version.
Name: 20150212_121223.jpg
Views: 11
Size: 1.87 MB
ID: 444370]() The finished Pep helmet
The finished Pep helmet
Next was the fibreglass resin on the outside. For this I used David's Fastglas Resin which I got from Halfords (UK)
![Click image for larger version.
Name: 20150212_123051.jpg
Views: 9
Size: 2.66 MB
ID: 444372]()
Applied Resin
![Click image for larger version.
Name: 20150219_142643.jpg
Views: 8
Size: 2.35 MB
ID: 444377]()
![Click image for larger version.
Name: 20150219_142636.jpg
Views: 10
Size: 1.85 MB
ID: 444376]()
![Click image for larger version.
Name: 20150219_142617.jpg
Views: 14
Size: 1.75 MB
ID: 444375]()
![Click image for larger version.
Name: 20150219_142648.jpg
Views: 16
Size: 2.23 MB
ID: 444378]()
I decided to go with a casting plastic to harden inside, mainly because the mandible and horn parts meant that fibreglassing the inside would be next to impossible, short of cutting them off which I was not keen on. I used Polycraft Polytek Easyflo 120 which is a 1:1 polyurethane plastic, which I got from here: http://www.mbfg.co.uk/polyurethane-c...syflo_120.html
The nice thing about this is that it is sold in numerous quantities. I got the 2 litre kit which contains a litre of each, part A and part B. I slushed this inside, trying my best to cover all the inside evenly, including the mandible bits which I could not see down into.
![Click image for larger version.
Name: 20150225_144605.jpg
Views: 12
Size: 2.18 MB
ID: 444384]()
![Click image for larger version.
Name: 20150225_144558.jpg
Views: 10
Size: 2.57 MB
ID: 444383]()
![Click image for larger version.
Name: 20150225_144538.jpg
Views: 15
Size: 2.22 MB
ID: 444382]()
It ended up coating quite thick in some areas, especially in the horns and I had a few wayward drips which I can just cut and sand. This has left the helmet fairly heavy and I would definitely try and go for thinner coverage next time.
I am now at the bodyfiller (Bondo but not bondo) stage, for which I am using a filler called P38 (also from Halfords)
Thanks and I will update as and when there is something to update :) Any feedback, tips, tricks and comments most welcome.
My inspiration is my own character from Destiny.
I modified the Pep file in Pepakura Designer for A4 size paper and checked the scale with the neck opening, which seemed fine for my large-ish head (about 61cms around)
I printed onto 250gsm/ 100lb cardstock which I got from 2 Daler Rowney Bristol Board pads
Building
I started with superglue but quickly moved onto a hot glue gun as this sped up the process considerably
My first go at Pepakura. I know Pep takes a long time but this seemed to take forever, as parts overlay and fold back on each other.
Next was the fibreglass resin on the outside. For this I used David's Fastglas Resin which I got from Halfords (UK)
Applied Resin
I decided to go with a casting plastic to harden inside, mainly because the mandible and horn parts meant that fibreglassing the inside would be next to impossible, short of cutting them off which I was not keen on. I used Polycraft Polytek Easyflo 120 which is a 1:1 polyurethane plastic, which I got from here: http://www.mbfg.co.uk/polyurethane-c...syflo_120.html
The nice thing about this is that it is sold in numerous quantities. I got the 2 litre kit which contains a litre of each, part A and part B. I slushed this inside, trying my best to cover all the inside evenly, including the mandible bits which I could not see down into.
It ended up coating quite thick in some areas, especially in the horns and I had a few wayward drips which I can just cut and sand. This has left the helmet fairly heavy and I would definitely try and go for thinner coverage next time.
I am now at the bodyfiller (Bondo but not bondo) stage, for which I am using a filler called P38 (also from Halfords)
Thanks and I will update as and when there is something to update :) Any feedback, tips, tricks and comments most welcome.
↧
Modifying a facehugger mask
As delivered, Rubies facehugger mask is a shapeless, floppy latex shell, looking a little like a facehugger but more like the unnatural offspring of an octopus and an elephant.
![Click image for larger version.
Name: Before_face_01a.jpg
Views: 28
Size: 61.4 KB
ID: 444435]()
Its faults are many: the fingers collapse; theres no contrast between the fingers and their reinforcing web; the eyeholes are emphasized by dark rims; the face/body distorts under the tails weight; the tails posing wire does not extend to the tail root; and the tail is too short.
![Click image for larger version.
Name: Before_left_01a.jpg
Views: 26
Size: 62.4 KB
ID: 444436]()
Still, the basic form is acceptable. To give shape to the fingers, I glued foam caulk backing rod inside the shell:
![Click image for larger version.
Name: Fingers_int_01a.jpg
Views: 20
Size: 82.5 KB
ID: 444437]()
![Click image for larger version.
Name: Fingers_ext_01a.jpg
Views: 13
Size: 85.1 KB
ID: 444438]()
Also, the body now is reinforced with pipe insulation sleeve, and I pushed a length of copper ground wire into the basal tail. Dark paint on the webs makes the fingers appear more prominent. Its still a work in progress, but I think much improved.
![Click image for larger version.
Name: After_right_01a.jpg
Views: 15
Size: 64.9 KB
ID: 444439]()
![Click image for larger version.
Name: After_left_01a.jpg
Views: 20
Size: 73.1 KB
ID: 444440]()
Its faults are many: the fingers collapse; theres no contrast between the fingers and their reinforcing web; the eyeholes are emphasized by dark rims; the face/body distorts under the tails weight; the tails posing wire does not extend to the tail root; and the tail is too short.
Still, the basic form is acceptable. To give shape to the fingers, I glued foam caulk backing rod inside the shell:
Also, the body now is reinforced with pipe insulation sleeve, and I pushed a length of copper ground wire into the basal tail. Dark paint on the webs makes the fingers appear more prominent. Its still a work in progress, but I think much improved.
↧
↧
Brock Rumlow Costume
Anyone know the brand of Pants he is wearing?
is the webbing suspenders worn backwards?
![Click image for larger version.
Name: Romlow_Burned2.png
Views: 28
Size: 2.37 MB
ID: 444482]()
thank you
is the webbing suspenders worn backwards?
thank you
↧
Help! Question about a type of fastener
I need to know what the belt/buckle fasteners on this piece of armour are called:
![Click image for larger version.
Name: MCI-2713.png
Views: 61
Size: 1.64 MB
ID: 444565]()
I've tried things like "leather belt fastener" and found next to nothing. Do they have some special name? I really need to know where I could buy some premade. Thanks!
Edit: Nevermind, just found some on Etsy. Realized I hadn't tried "closure" and found exactly what I was looking for.
I've tried things like "leather belt fastener" and found next to nothing. Do they have some special name? I really need to know where I could buy some premade. Thanks!
Edit: Nevermind, just found some on Etsy. Realized I hadn't tried "closure" and found exactly what I was looking for.
↧
Help Helmet Garo
Hi guys,
Do any of you have this file (pdo)for Foam or pape,to pass me or could help me with it? :$
Garo - Makai Senki
![Click image for larger version.
Name: sdsdw.jpg
Views: 71
Size: 212.9 KB
ID: 444900]()
Do any of you have this file (pdo)for Foam or pape,to pass me or could help me with it? :$
Garo - Makai Senki
↧